In this tutorial, we will show you how to create a themed Hugo blog, make your first blog post and how to share it with the world by hosting your site to IPFS by using Fleek.
Let’s get started!
Install HUGO
To install on Mac or Linux, we will need Homebrew installed. Then, we can run:
brew install hugoFor Windows, Chocolatey can be used for installation with the following command:
choco install hugo -confirmClick here for more information regarding installing Hugo. We can verify that installation was successful by running:
hugo versionIn my case, the console returns the following:
Hugo Static Site Generator v0.67.1/extended Linux/amd64 BuildDate: unknownIt’s a success! We can now create a new site.
Create a new project
Run the command below to initialize a new project.
hugo new site name_of_projectNow that the project is created, change directory into the newly created project (cd name_of_project). Now run this command inside the project:
hugo serverThis will run your website on the localhost with live reload by going to http://localhost:1313. But you might have noticed we are seeing…a blank screen. That’s because we still need to select a theme!
Selecting a theme
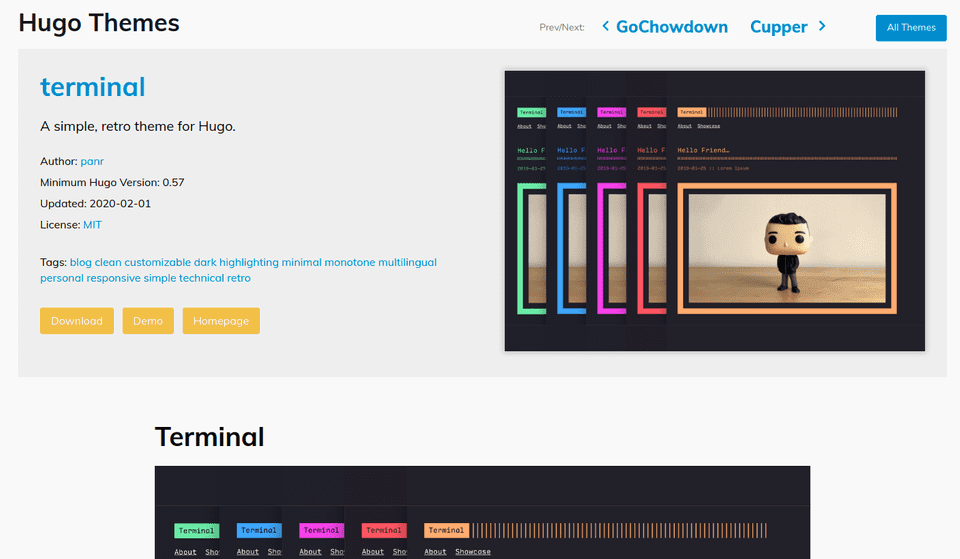
Hugo has a TON of great themes we can select from which you can browse by clicking here. There’s one called Terminal which looks nice so let’s use it. Here is the theme’s page with more information and a demo too!
Clicking on Download will bring us to the project’s GitHub page. Now we need to get this theme in our blog. Here’s what the file structure of the project should look like right now:
tree.

.
├── archetypes
│   └── default.md
├── config.toml
├── content
├── data
├── layouts
├── resources
│   └── _gen
│       ├── assets
│       └── images
├── static
└── themes
Run the following command in the project’s directory to install the theme by the theme as a git submodule.
git submodule add https://github.com/panr/hugo-theme-terminal.git themes/terminalThe theme is now installed! If you go to the themes folder, you will find “terminal”, the theme we want to use. You will still not see anything if you go to http://localhost:1313. That’s because we still need to configure the theme.
Configuring the theme
Let’s take a quick look at the site structure again.
tree. -L 1


.
├── archetypes
├── config.toml
├── content
├── data
├── layouts
├── resources
├── static
└── themes
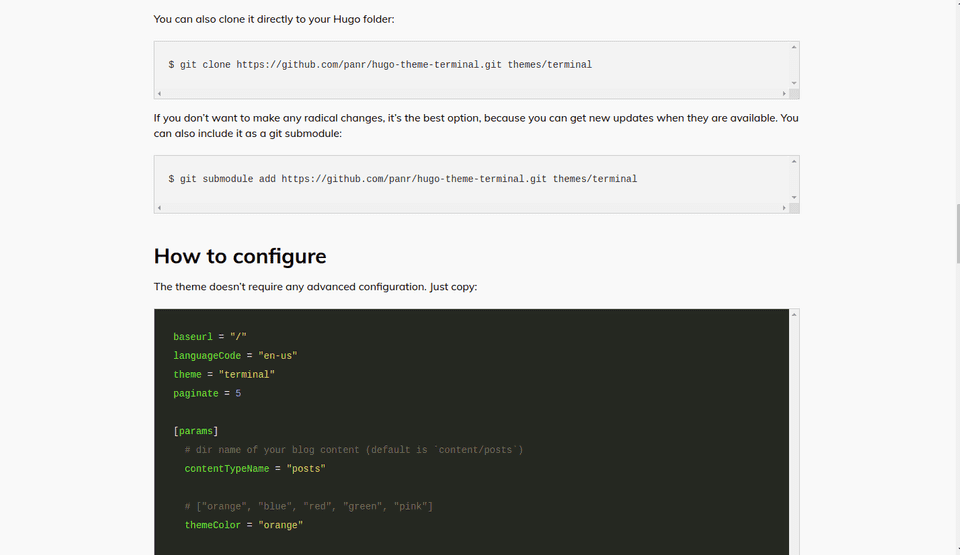
We have a config.toml file at the root of the project. The configuration that goes into this file will change on a theme to theme basis, but very often the theme’s page has a sample configuration that we can base ourselves on and modify. So first we’ll go to the theme’s page: https://themes.gohugo.io/hugo-theme-terminal/ And find the section “How to Configure”
Then we copy all the content in the code box and copy-past it to config.toml.
Your config.toml file should look like this:
baseurl = "/"
languageCode = "en-us"
theme = "terminal"
paginate = 5

[params]
  # dir name of your blog content (default is `content/posts`)
  contentTypeName = "posts"

  # ["orange", "blue", "red", "green", "pink"]
  themeColor = "orange"

  # if you set this to 0, only submenu trigger will be visible
  showMenuItems = 2

  # show selector to switch language
  showLanguageSelector = false

  # set theme to full screen width
  fullWidthTheme = false

  # center theme with default width
  centerTheme = false

  # set a custom favicon (default is a `themeColor` square)
  # favicon = "favicon.ico"

  # set all headings to their default size (depending on browser settings)
  # it's set to `true` by default
  # oneHeadingSize = false

[languages]
  [languages.en]
    languageName = "English"
    title = "Terminal"
    subtitle = "A simple, retro theme for Hugo"
    keywords = ""
    copyright = ""
    menuMore = "Show more"
    readMore = "Read more"
    readOtherPosts = "Read other posts"

    [languages.en.params.logo]
      logoText = "Terminal"
      logoHomeLink = "/"

    [languages.en.menu]
      [[languages.en.menu.main]]
        identifier = "about"
        name = "About"
        url = "/about"
      [[languages.en.menu.main]]
        identifier = "showcase"
        name = "Showcase"
        url = "/showcase"
Now, let’s run the following command:
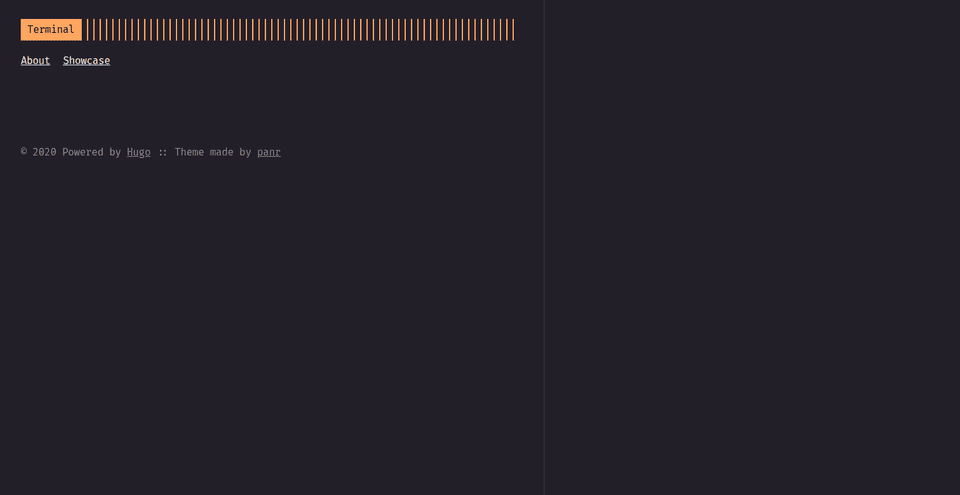
hugo serverIf we go to http://localhost:1313, we get a basic page.
By tweaking the config.toml file we can change many things about our blog such as menu items, color, etc… in an intuitive manner.
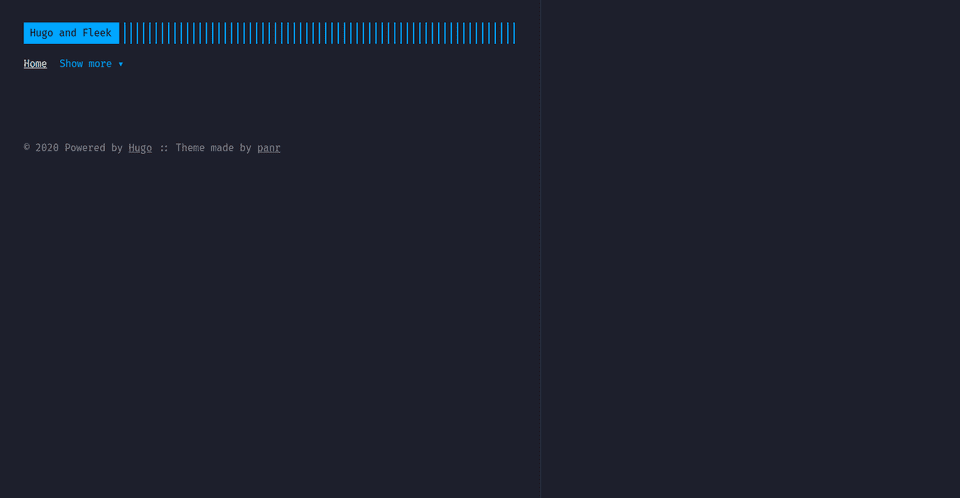
Here is my new configuration after modifying the blog to my liking:
baseurl = "/"
languageCode = "en-us"
theme = "terminal"
paginate = 5
relativeUrls = true

[params]
  # dir name of your blog content (default is `content/posts`)
  contentTypeName = "posts"

  # ["orange", "blue", "red", "green", "pink"]
  themeColor = "blue"

  # if you set this to 0, only submenu trigger will be visible
  showMenuItems = 1

  # show selector to switch language
  showLanguageSelector = false

  # set theme to full screen width
  fullWidthTheme = false

  # center theme with default width
  centerTheme = false

  # set a custom favicon (default is a `themeColor` square)
  # favicon = "favicon.ico"

  # set all headings to their default size (depending on browser settings)
  # it's set to `true` by default
  # oneHeadingSize = false

[languages]
  [languages.en]
    languageName = "English"
    title = "Fleek and Hugo"
    subtitle = "Hugo Works Great with Fleek!!!"
    keywords = ""
    copyright = ""
    menuMore = "Show more"
    readMore = "Read more"
    readOtherPosts = "Read other posts"

    [languages.en.params.logo]
      logoText = "Hugo and Fleek"
      logoHomeLink = "/"

    [languages.en.menu]
      [[languages.en.menu.main]]
        identifier = "home"
        name = "Home"
        url = "/"
      [[languages.en.menu.main]]
        identifier = "about_fleek"
        name = "Learn About Fleek"
        url = "https://fleek.co"
      [[languages.en.menu.main]]
        identifier = "about_hugo"
        name = "Learn About Hugo"
        url = "https://gohugo.io"
Please note the line relativeUrls = true which I added at the top. This line is important to make the blog work on IPFS gateways which use paths in their URL in the format /ipfs/HASH. If you have issues having your site show CSS styling on an IPFS gateway, that’s the line you are likely missing!
And the result below:
But what is a blog without blog posts? Let’s create our first post now!
Create a blog post
Run the following command:
hugo new posts/hello-world.mdNow, a new file appeared in this location: /content/posts/hello-world.md.
Why did we add the blog post to /posts? Because that’s what I could gather from looking at the contentTypeName variable in config.toml. So with this theme, it is /posts, but other themes might require posts to be at a different directory. Just make sure that the config.toml matches the location of the blog posts.
So, let’s take a look at our newly created blog post.
---
title: "Hello World"
date: 2020-03-11T16:23:24-04:00
draft: false
---
Title and date corresponding to the title of the blog post. Draft means the blog post is in draft mode and will, therefore, not show up in the blog. We can turn it to false to see the article once we are done writing our content.
You might have noticed that the blog post’s extension is .md, signaling that the file is written in markdown. Markdown is a popular markup language. If you’ve never heard of it, check out this cheat sheet. Markdown is pretty straightforward and can get you productive immediately. Below, I’ve written a sample blog post.
---
title: "Hello World"
date: 2020-03-11T16:23:24-04:00
draft: false
---

# Hello world!!

Welcome to my **awesome** new blog everyone! My blog is deployed on [IPFS](https://ipfs.io) thanks to [Fleek](https://fleek.co) and using [Hugo](https://http://gohugo.io/).

It was so **easy**!!
It won’t win an award, but it’s good enough! 😂
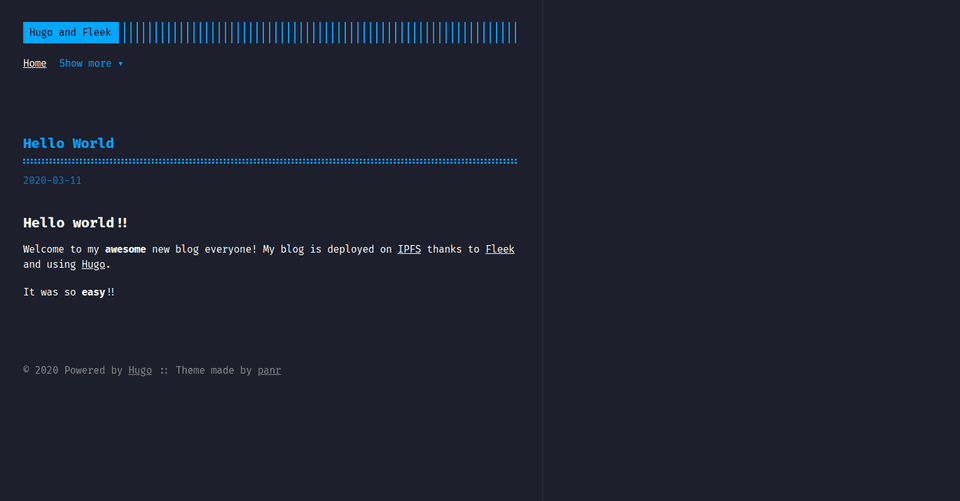
Now, we look at the blog through http://localhost:1313:
The blog post is there! We can click on it and read its awesome content. At this point, we can either write more blog posts, add images, further style our blog, etc…
But we want to share our content with the world ASAP, so let’s deploy the blog on IPFS with Fleek.
Deploying with Fleek
First, we need to create a GitHub repository and push all of our project’s content to the repo. It will look like this: https://github.com/SamueleA/hugo-fleek. Fleek will pull the repo’s content, build it, and publish it.
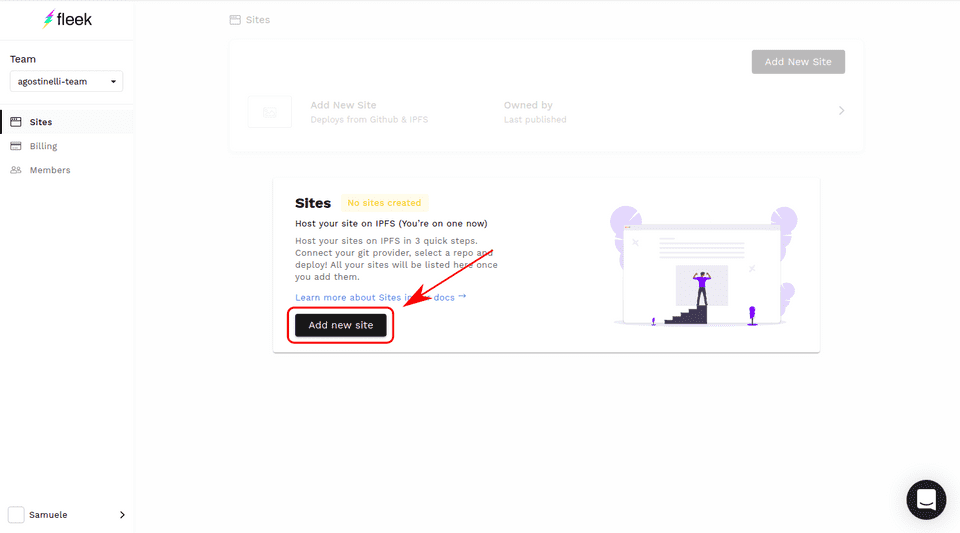
Next, log in to your Fleek account and add a new site.
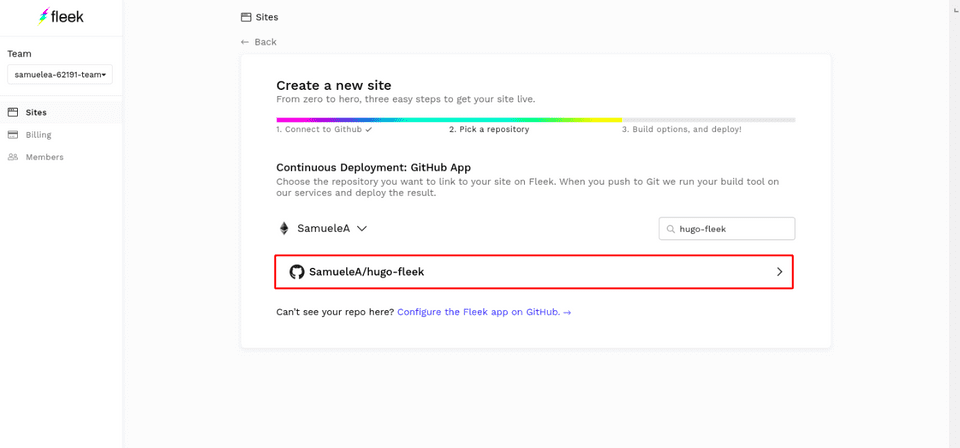
Select the repo containing the Hugo blog.
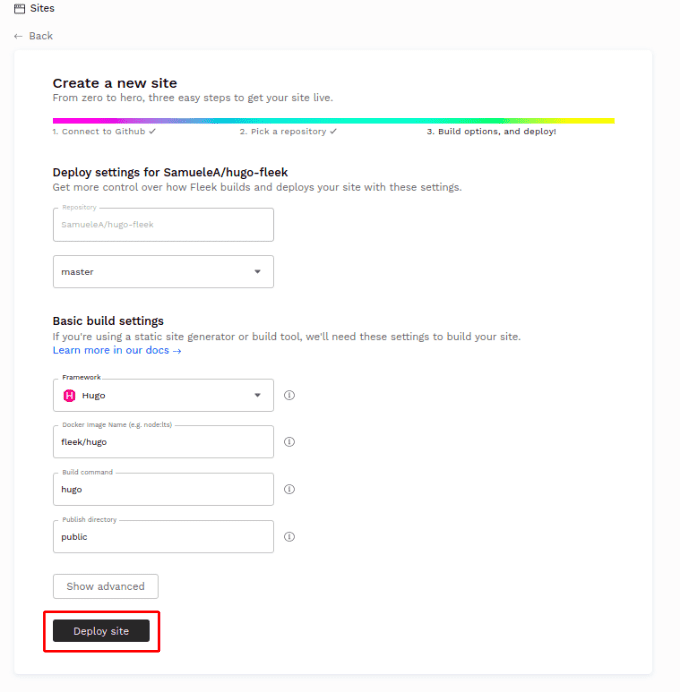
Now we must enter the build settings. Luckily for us, Fleek auto-detects our Hugo settings and fills the fields for us, so we don’t have anything to change!
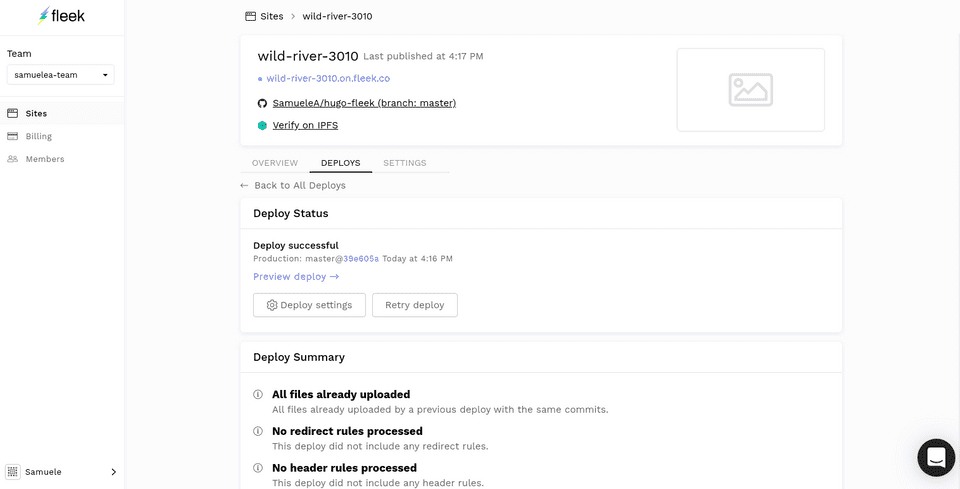
Next, we click DEPLOY SITE button and wait until the completion of the deployment. The screen will look like this once it is done:
And if we click on wild-river-3030.on.fleek.co, we are greeted by our beautiful Hugo blog hosted on IPFS!
Your turn! Now, it’s your turn to create an awesome Hugo blog and host it on IPFS through Fleek.
Share the result with us on twitter. We’d love to see what you come up with!
