So you’re ready to get started on Fleek? Well, let’s get right into it. In this guide, we will walk through deploying a website to IPFS using Fleek. This guide is most helpful if you are already signed up for Fleek. If you haven’t already signed up you can request early access.
Let’s get started by signing up for Fleek and deploying a website:
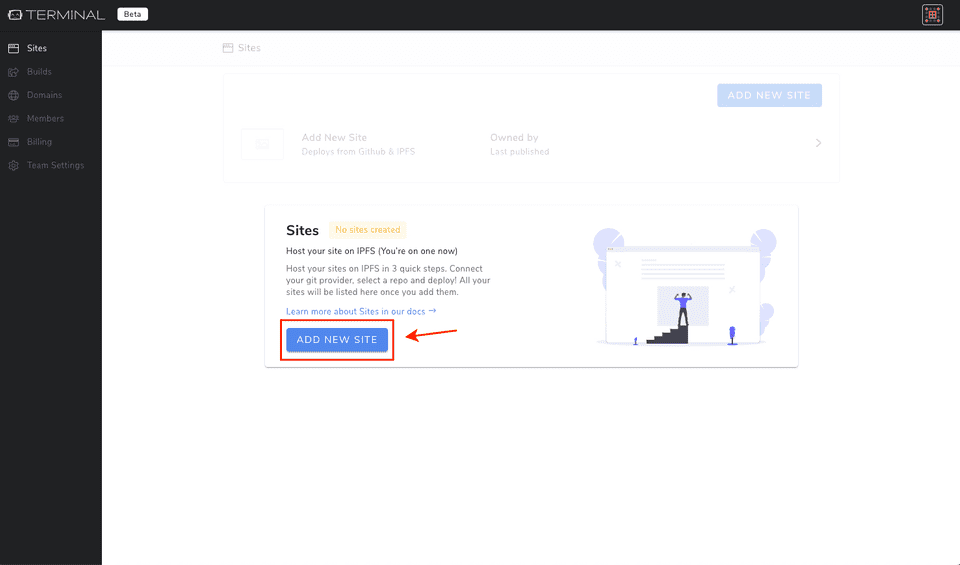
1. Add New Site
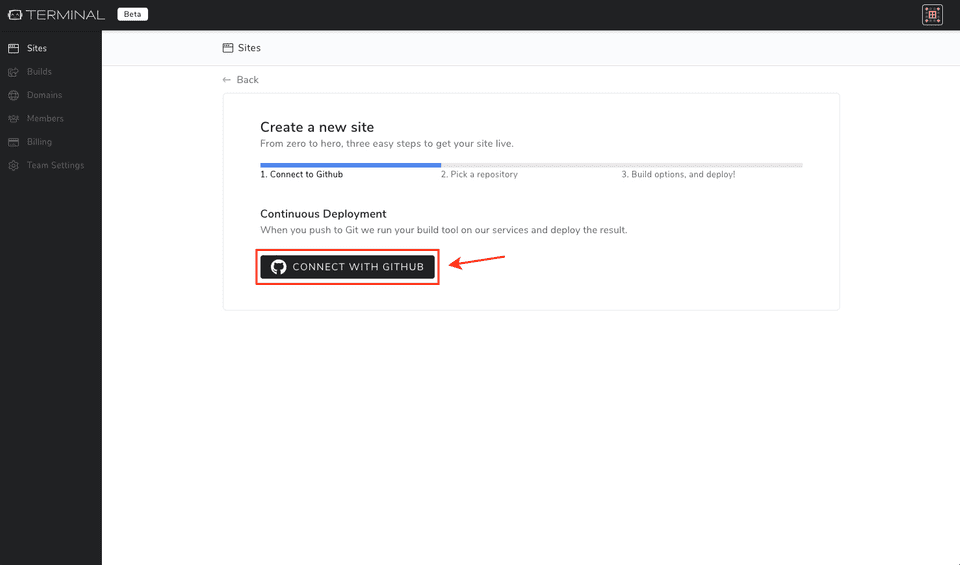
2. Connect with GitHub
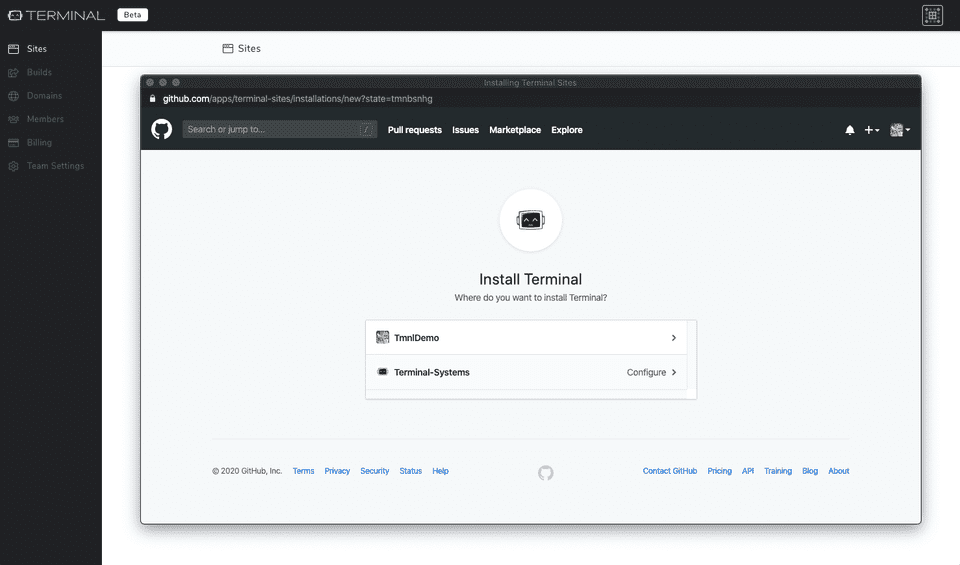
3. Select the GitHub account where you want to install Fleek
(Where the repository for the website or application you plan to deploy is located)
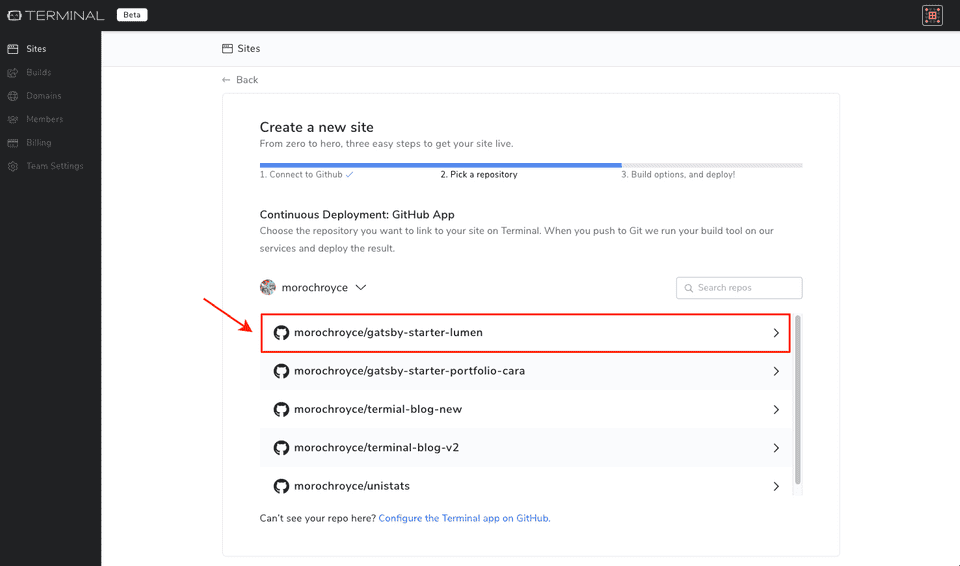
4. Pick the repository you want to deploy
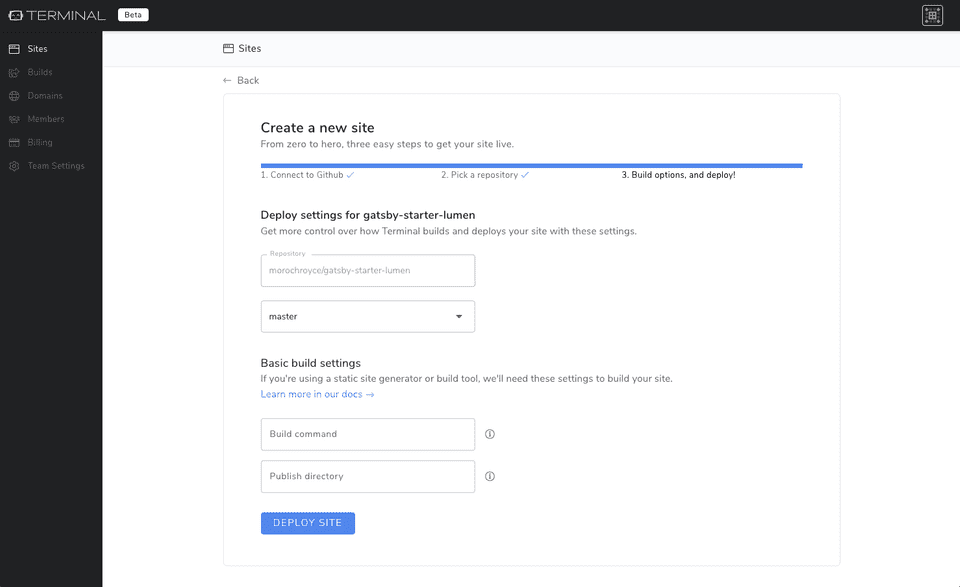
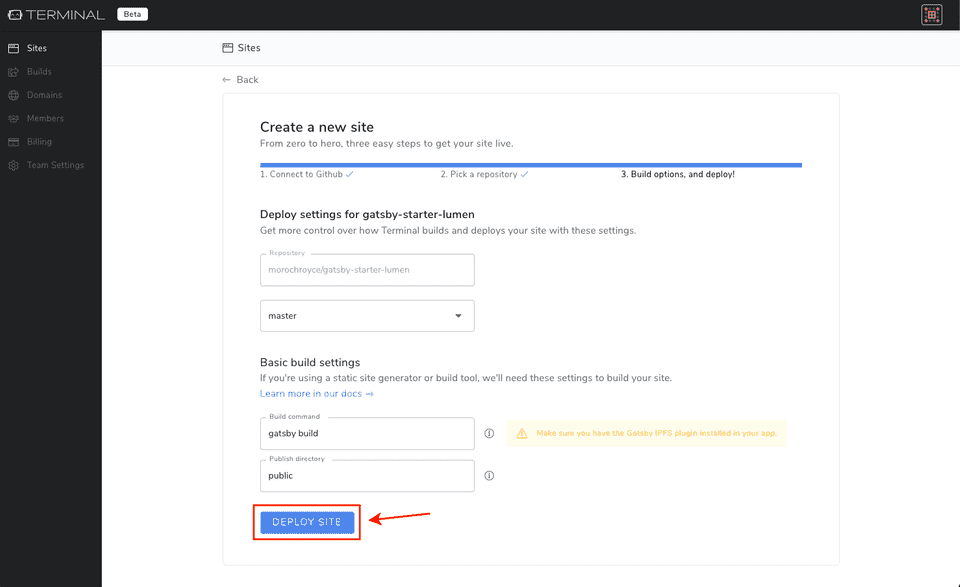
5. Fill in your build command and publish directory as described in your package.json
(We will auto-populate the build command and directory if we find it)
6. Deploy your Site!
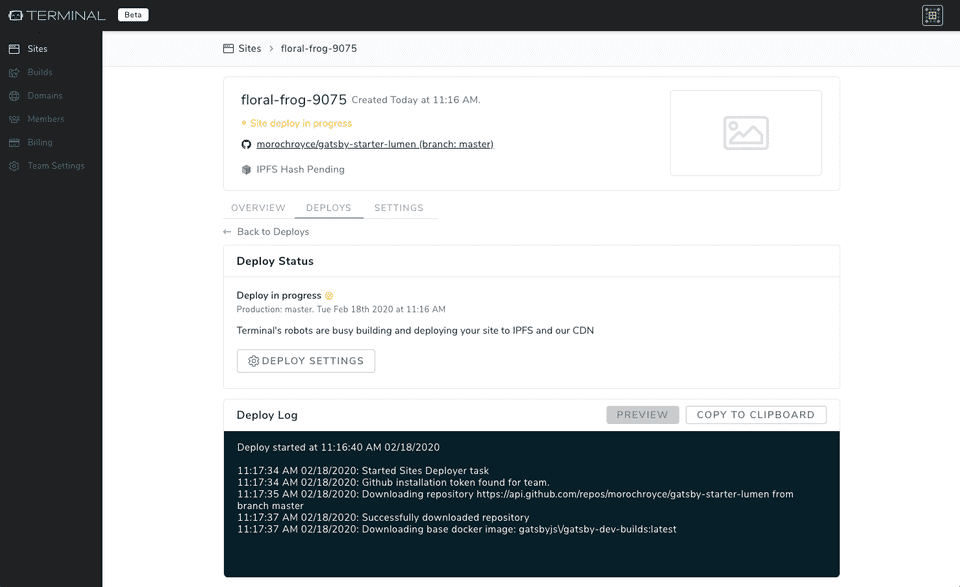
While your site is deploying you’re redirected to monitor its progress with detailed logs during each step of the deployment.
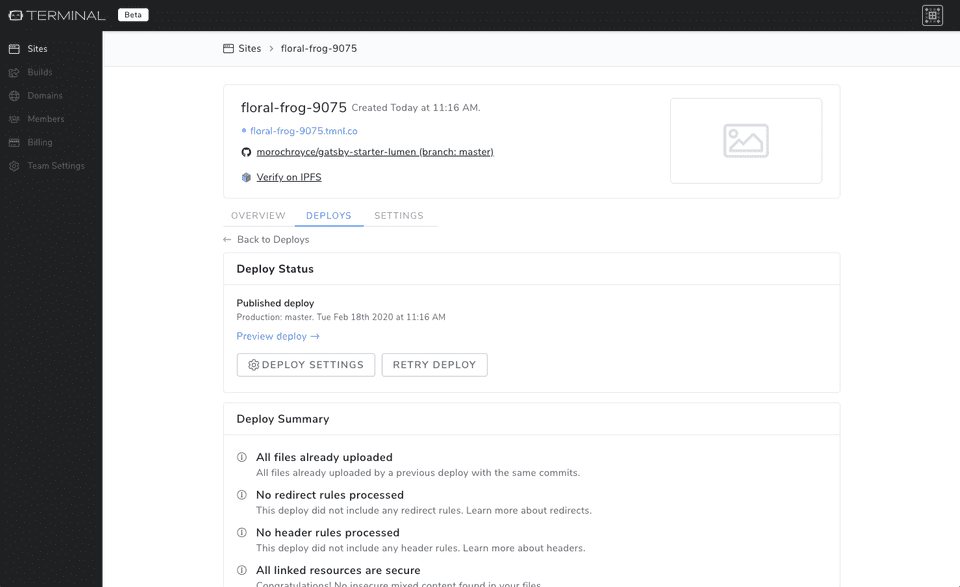
Once the site is deployed successfully, the site will be uploaded to IPFS and the IPFS hash will be mapped to a Fleek subdomain. You can click on the Fleek subdomain to preview your live site on IPFS!
Now that you have deployed a performant website on IPFS, let’s add or buy a domain to your site. There are three ways to add a domain to your site: You can add a subdomain, add a root domain, or purchase a new domain.
Adding a Subdomain
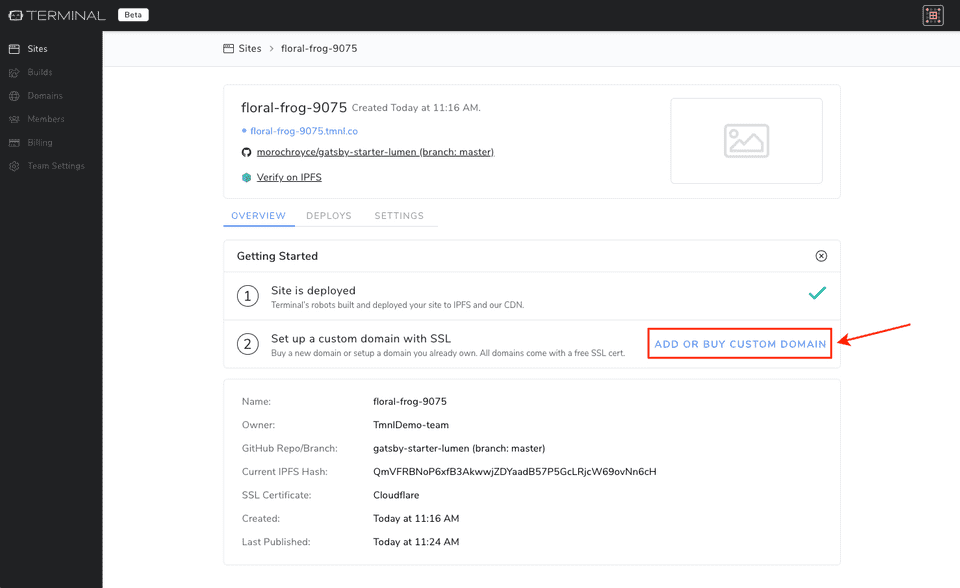
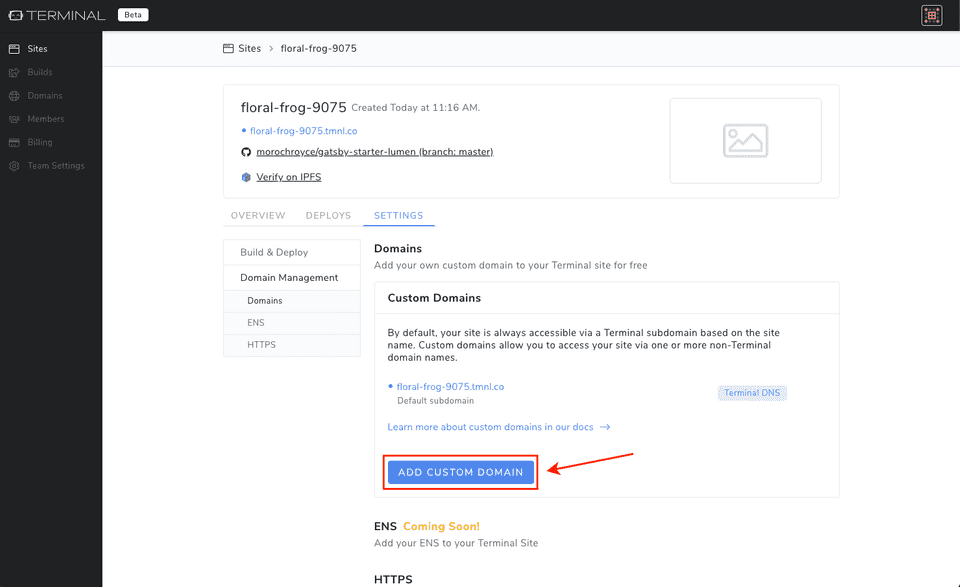
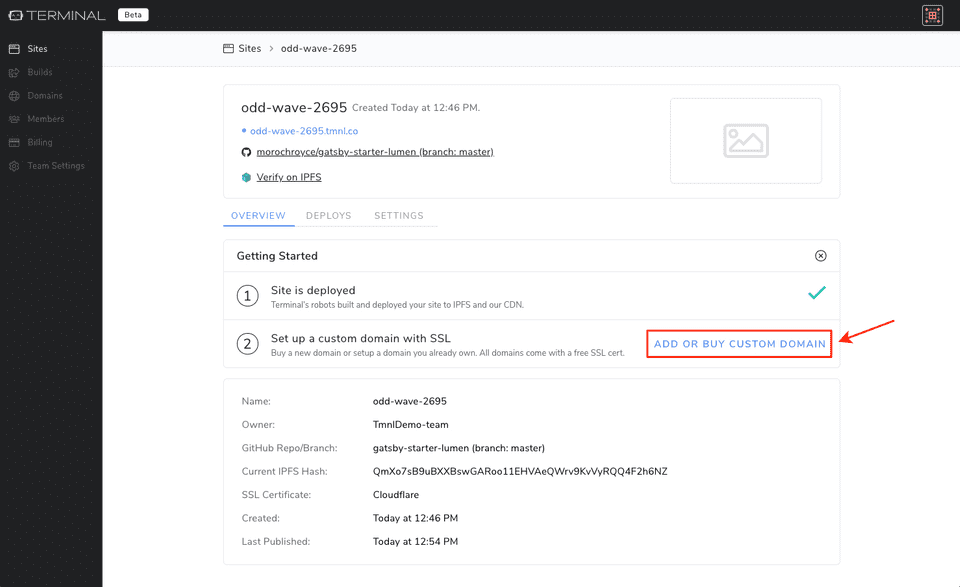
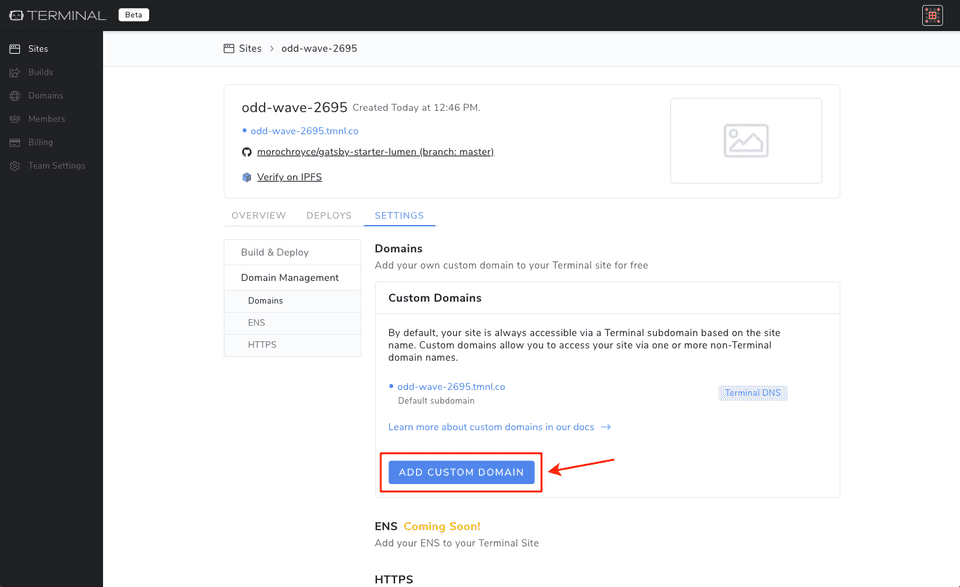
1. Click “Add or Buy Custom Domain” on the overview tab in the getting started, or go to the settings tab and navigate to the domain management section using the left navigation
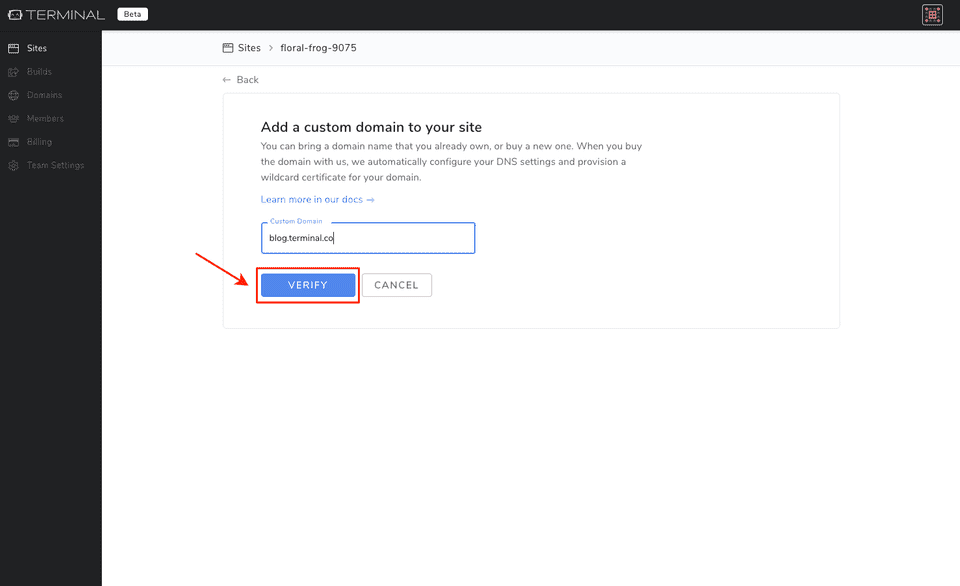
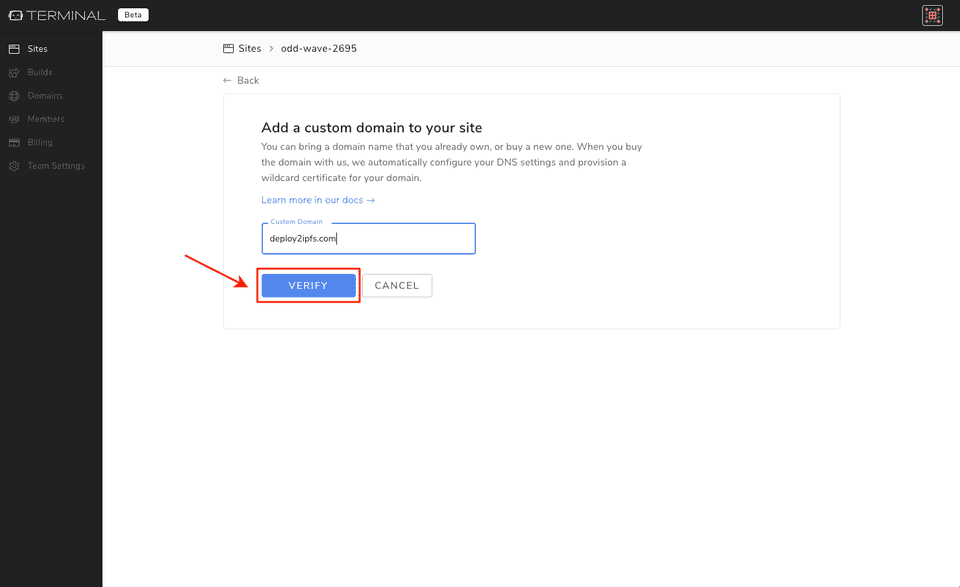
2. Type in your subdomain that is managed in an external DNS provider and click “Verify”
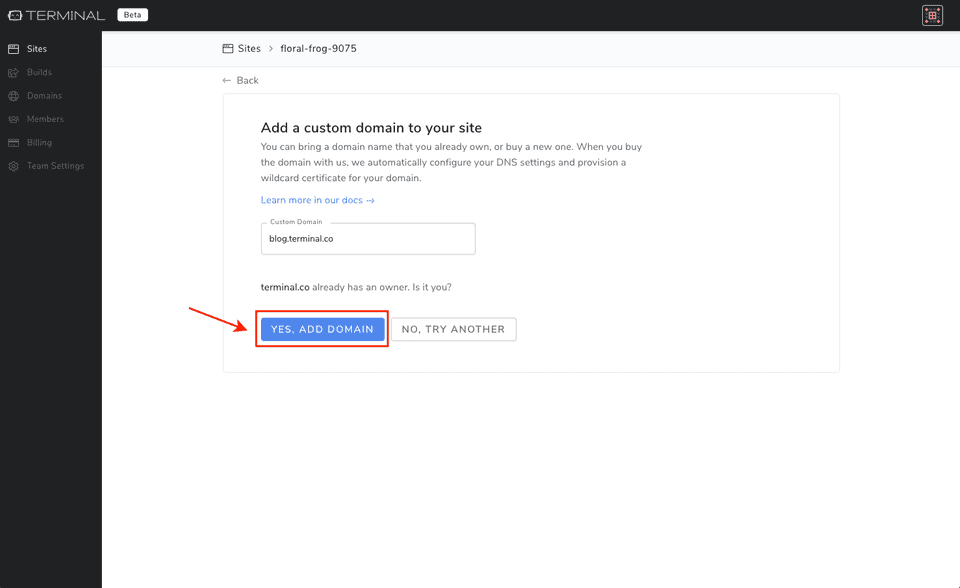
3. Click “Yes, Add Domain” to verify this domain is owned by you
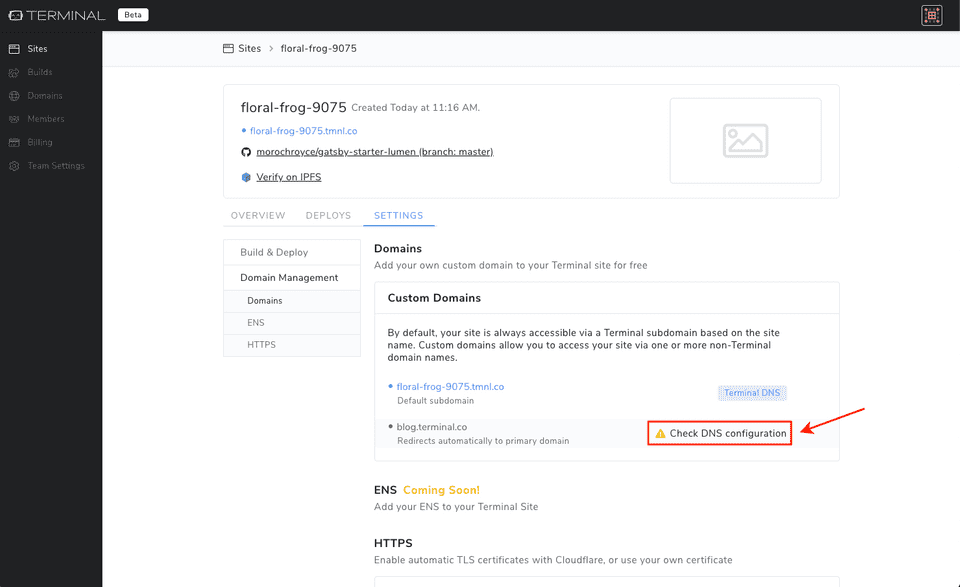
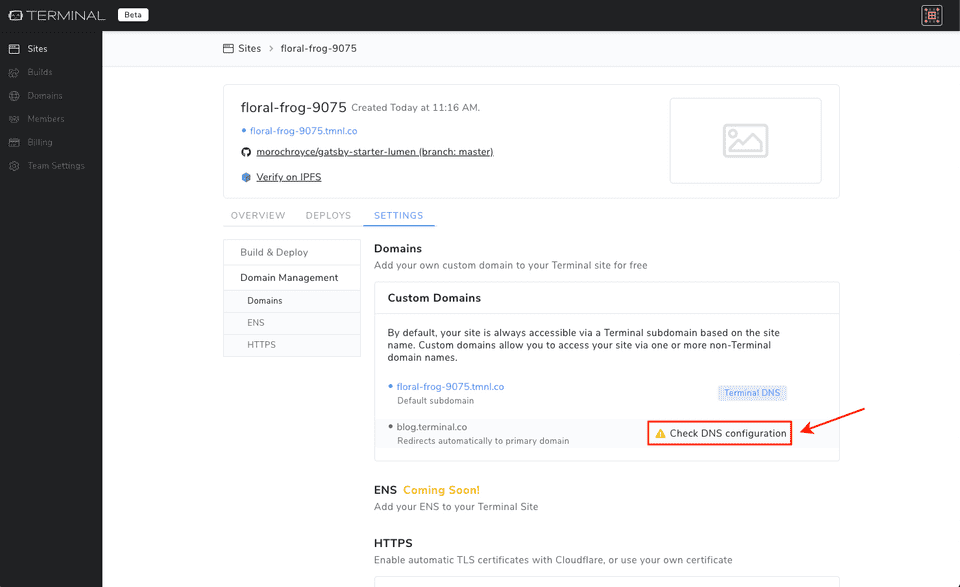
4. Click on “Check DNS Configuration” next to your subdomain to see the instructions to add the CNAME record to your domain in your DNS provider.
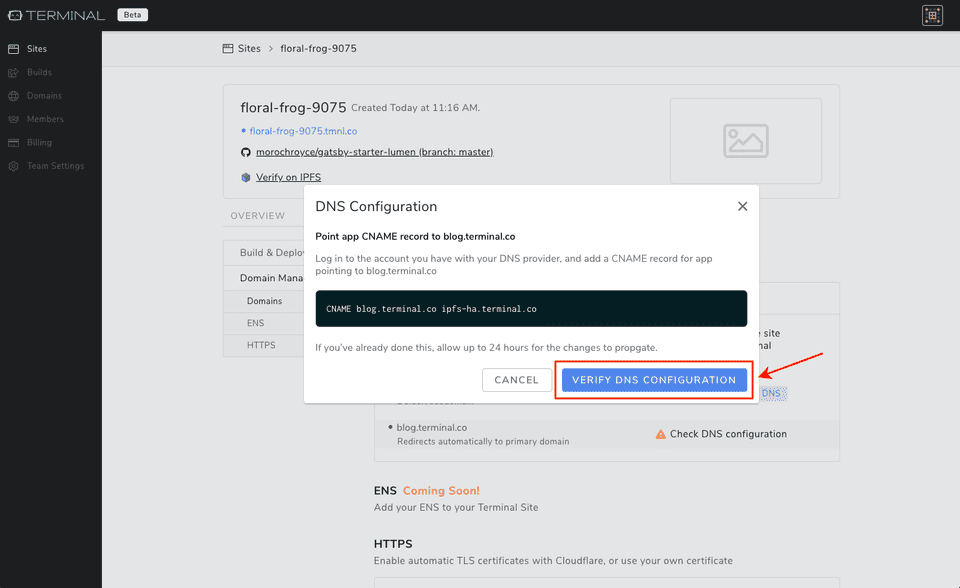
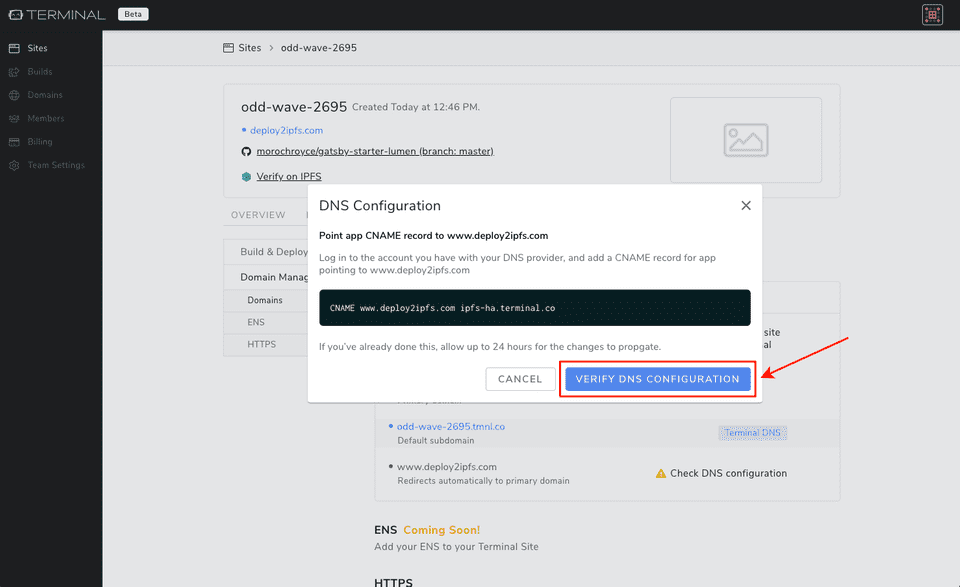
5. Follow the instructions to add the CNAME record to your DNS provider. Once you’ve created a record in your DNS provider, click “Verify DNS Configuration” to check the propagation of the DNS to your site. If it fails please wait a few more minutes for the DNS to finish propagating and try again.
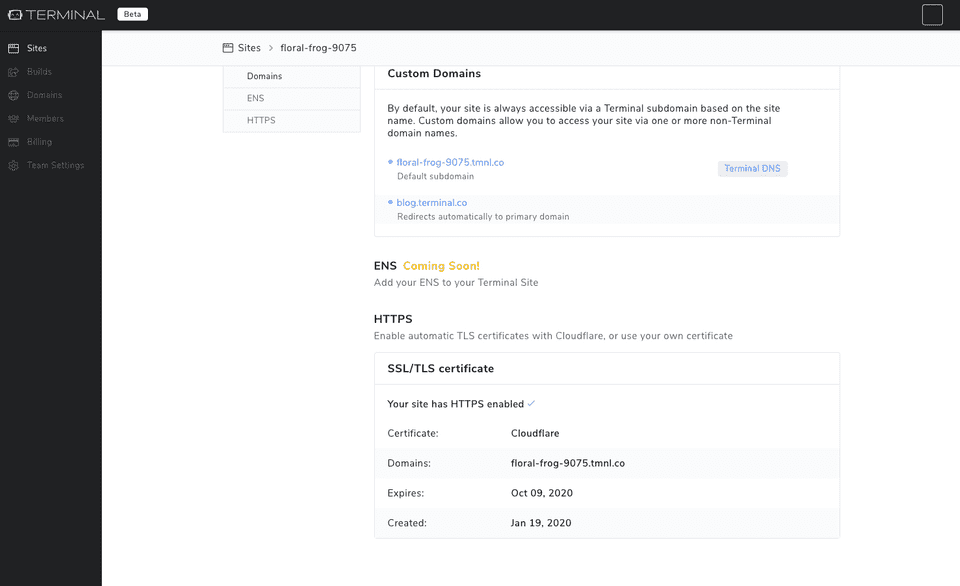
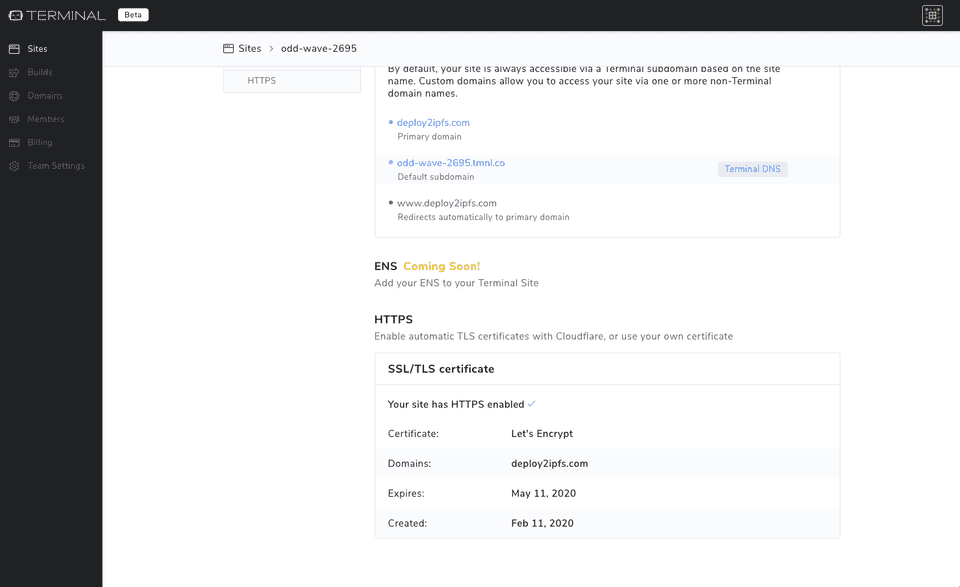
6. Your site has successfully propagated and received a free SSL certificate from Let’s Encrypt. You can see details about the SSL certificate below in your domain management settings.
Adding a root domain
1. Click “Add or Buy Custom Domain” on the overview tab in the getting started, or go to the settings tab and navigate to the domain management section using the left navigation
2. Type in your root domain that is managed in an external DNS provider and click “Verify”
3. Click “Yes, Add Domain” to verify this domain is owned by you
4. The root domain and an additional www. Subdomain, to redirect to the root domain, will be added to your domain management settings. Click on “Check DNS Configuration” next to the root domain to see the instructions to add the A record to your domain in your DNS provider for the root domain. For the www. Subdomain configuration, follow step 4 through step 6 to get set up
5. Follow the instructions to add the A record to your DNS provider. Once you’ve created a record in your DNS provider, click “Verify DNS Configuration” to check the propagation of the DNS to your site. If it fails please wait a few more minutes for the DNS to finish propagating and try again
6. Your site has successfully propagated and received a free SSL certificate from Let’s Encrypt. You can see details about the SSL certificate below in your domain management settings.
- Sign up to try yourself
- Join our Community Chat
- Follow us on Twitter
- Check out our Tech Docs
- Contact us at support@fleek.co
