Juan here from the DevRel team! dApps are gaining popularity due to their decentralized nature, which provides enhanced security and transparency to users. However, developing a dApp from scratch can be a challenging task.
Luckily, many boilerplate projects are available to help developers get started quickly. But most of them either use proprietary APIs or outdated tech stacks.
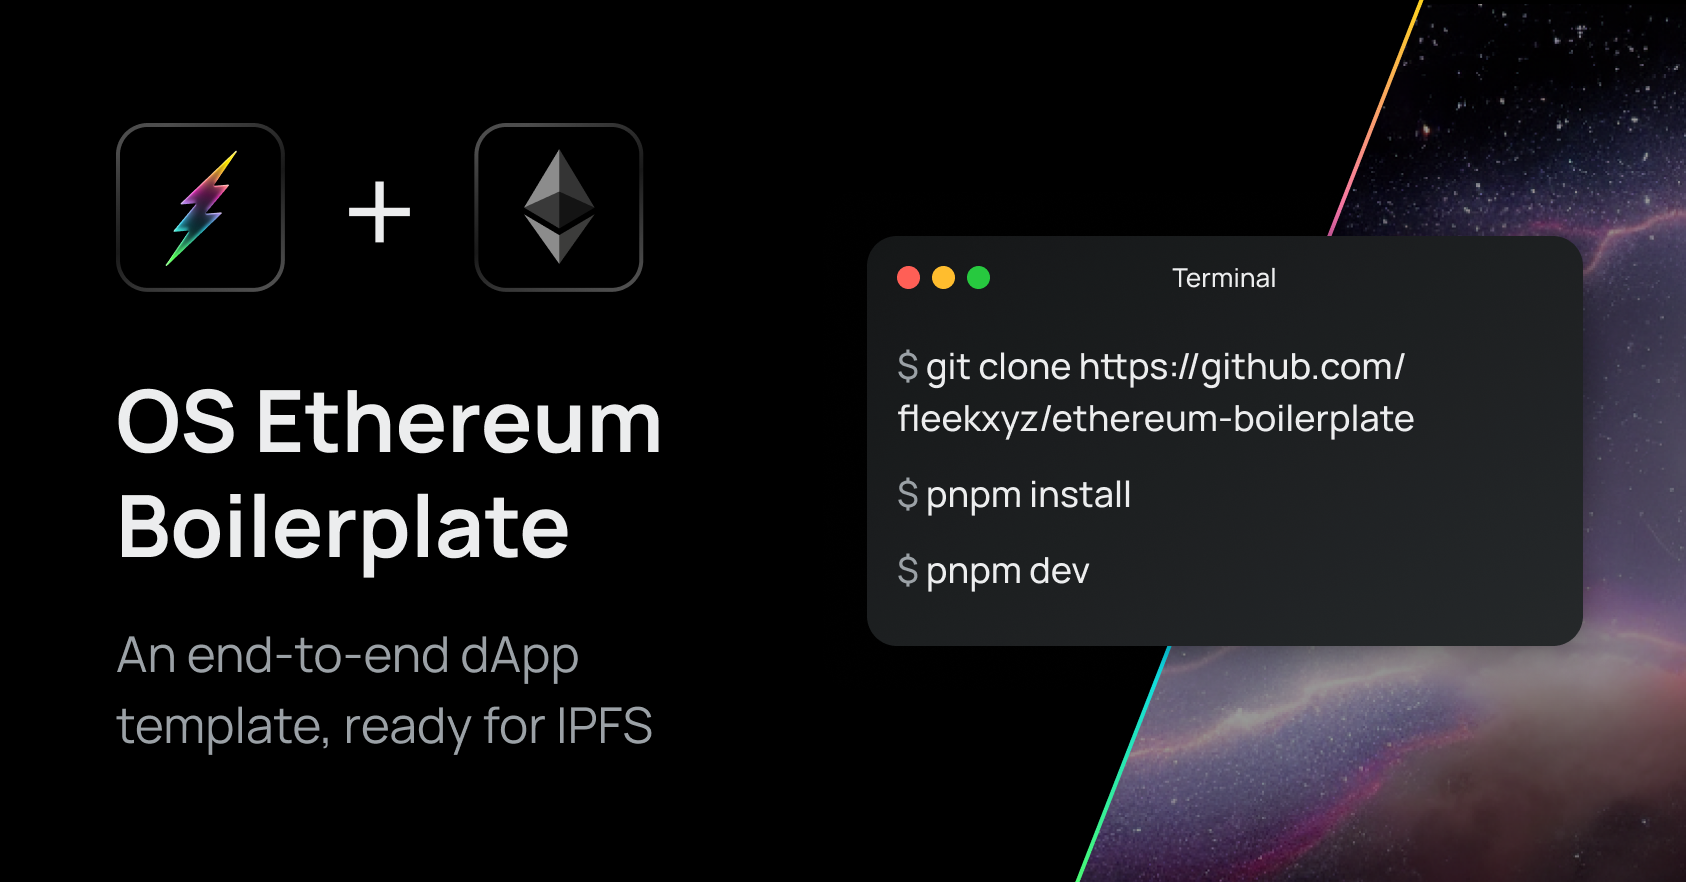
That’s why I created the ethereum-boilerplate, a fully open-source boilerplate with no binding dependencies that utilize the latest tech stack and provides a solid starting point for developing Ethereum-based dApps end-to-end, from its contract to a Next.js frontend.
Index ⚡
- Getting Started
- The Tech Stack
- The Smart Contract
- The Next.js Frontend
- Customizing the Boilerplate
- Moving into Production
- Deploying to Fleek!
Getting Started with the Ethereum Boilerplate
To get started with the ethereum-boilerplate, simply clone the repository and install the dependencies by running pnpm install. Then, start the project using pnpm dev. It’s that simple!
TL;DR - clone, install, run!

git clone https://github.com/fleekxyz/ethereum-boilerplate
pnpm install
pnpm dev
The Tech Stack
This ethereum-boilerplate utilizes the following stack:
- Hardhat for setting up the Ethereum development environment
- Next.js for building the frontend application
- TypeScript for type safety and error checking
- wagmi for communicating with deployed contracts using React hooks
- RainbowKit for wallet integration and authentication
- Tailwind for easy and efficient styling
Additionally, the boilerplate includes a suggested deployment strategy using Alchemy for deploying smart contracts and Fleek CLI for deploying the front end using IPFS. This allows for a fully decentralized application, and it can be replaced by your preferred flow.
The Smart Contract
I started building the ethereum-boilerplate by creating a basic Token contract and compiling it, and deploying it using Hardhat. Hardhat provides a plugin architecture where most of its functionality comes from.
I added several plugins, including @nomicfundation/hardhat-toolbox, which bundles commonly used packages, including a way to test your contracts with Mocha, Chai, and hardhat chai matchers for a straightforward testing experience.
The hardhat-deploy plugin makes it easy to deploy contracts to any network, keeping track of them and replicating the same environment for testing. With HCR (hot contract replacement), developers can enjoy a similar experience to the frontend’s Hot Module Replacement and create a custom deployment for every contract created.
You can see the implementation of the Token contract at contracts/Token.sol, and its deployment specification at deploy/001deploytoken.ts. These deployment details can be customized, such as the contract’s deployer and tokenOwner, by reading from hardhat.config.namedAccounts
The Next-js Frontend
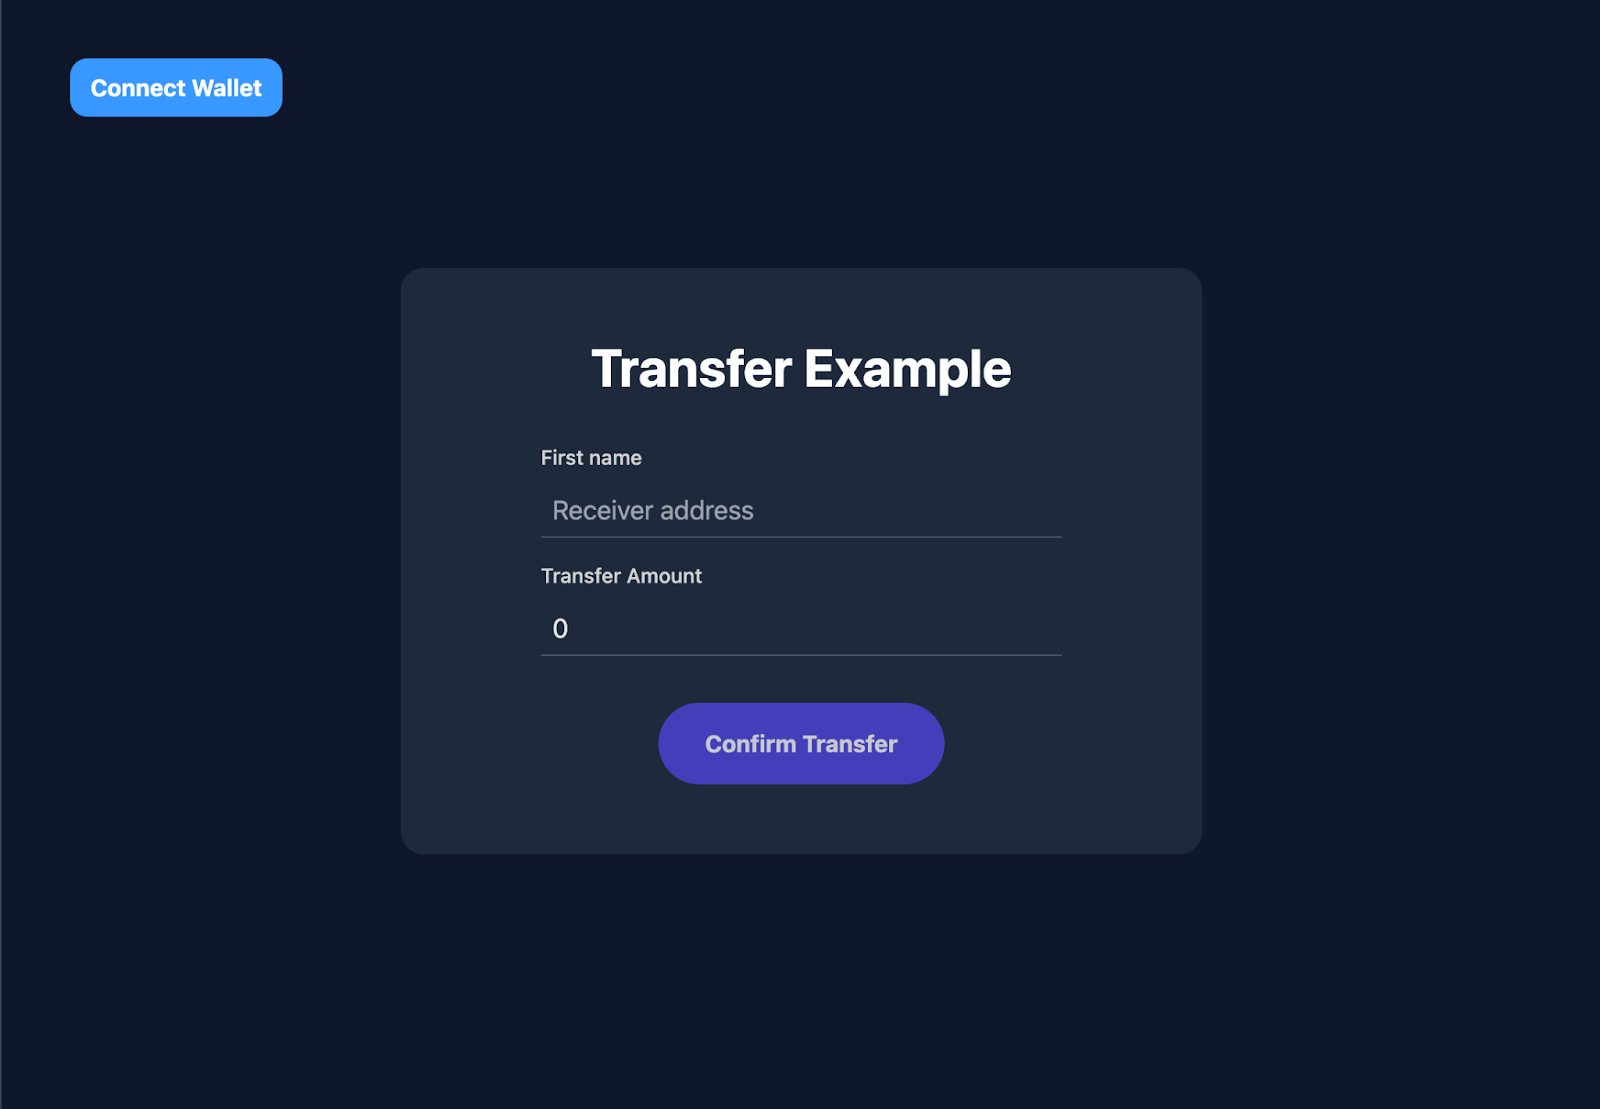 A simple frontend base with Rainbowkit-enabled authentication and a transfer test.
The ethereum-boilerplate includes a Next.js application inside the frontend folder, with minimal configuration, that utilizes TypeScript, wagmi hooks for communicating with the deployed contract, RainbowKit for wallet integration, and tailwind for styling.
Next.js was chosen as the framework of choice due to its blazing-fast speed and the ability to perform static deployments (which IPFS hosting currently supports). The Typechain library ensures that you can confidently access contracts.Token.address without causing any type errors.
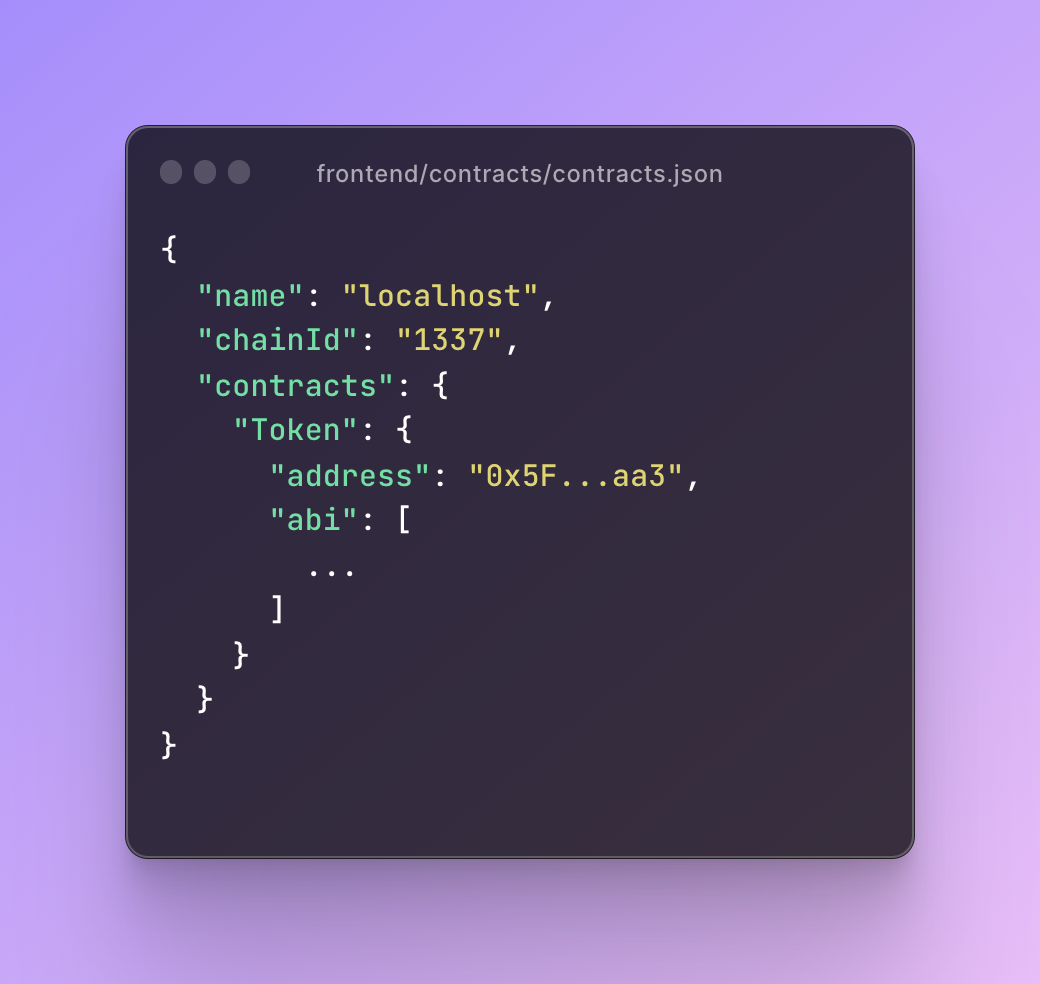
A cool piece is that if you need to access your contract’s ABI or address, you can find them in frontend/contracts/contracts.json. This file contains a field called contracts, which includes the ABI and the address of each contract. Here’s an example of what you can expect in the contracts.json file.
Customizing the Boilerplate
To customize the boilerplate, you must check a few files and folders. You can start by checking the contracts folder on the projects base directory.
Each contract should include a deployment function located inside the deploy folder. Let’s check the 001deployt_ken.ts file:
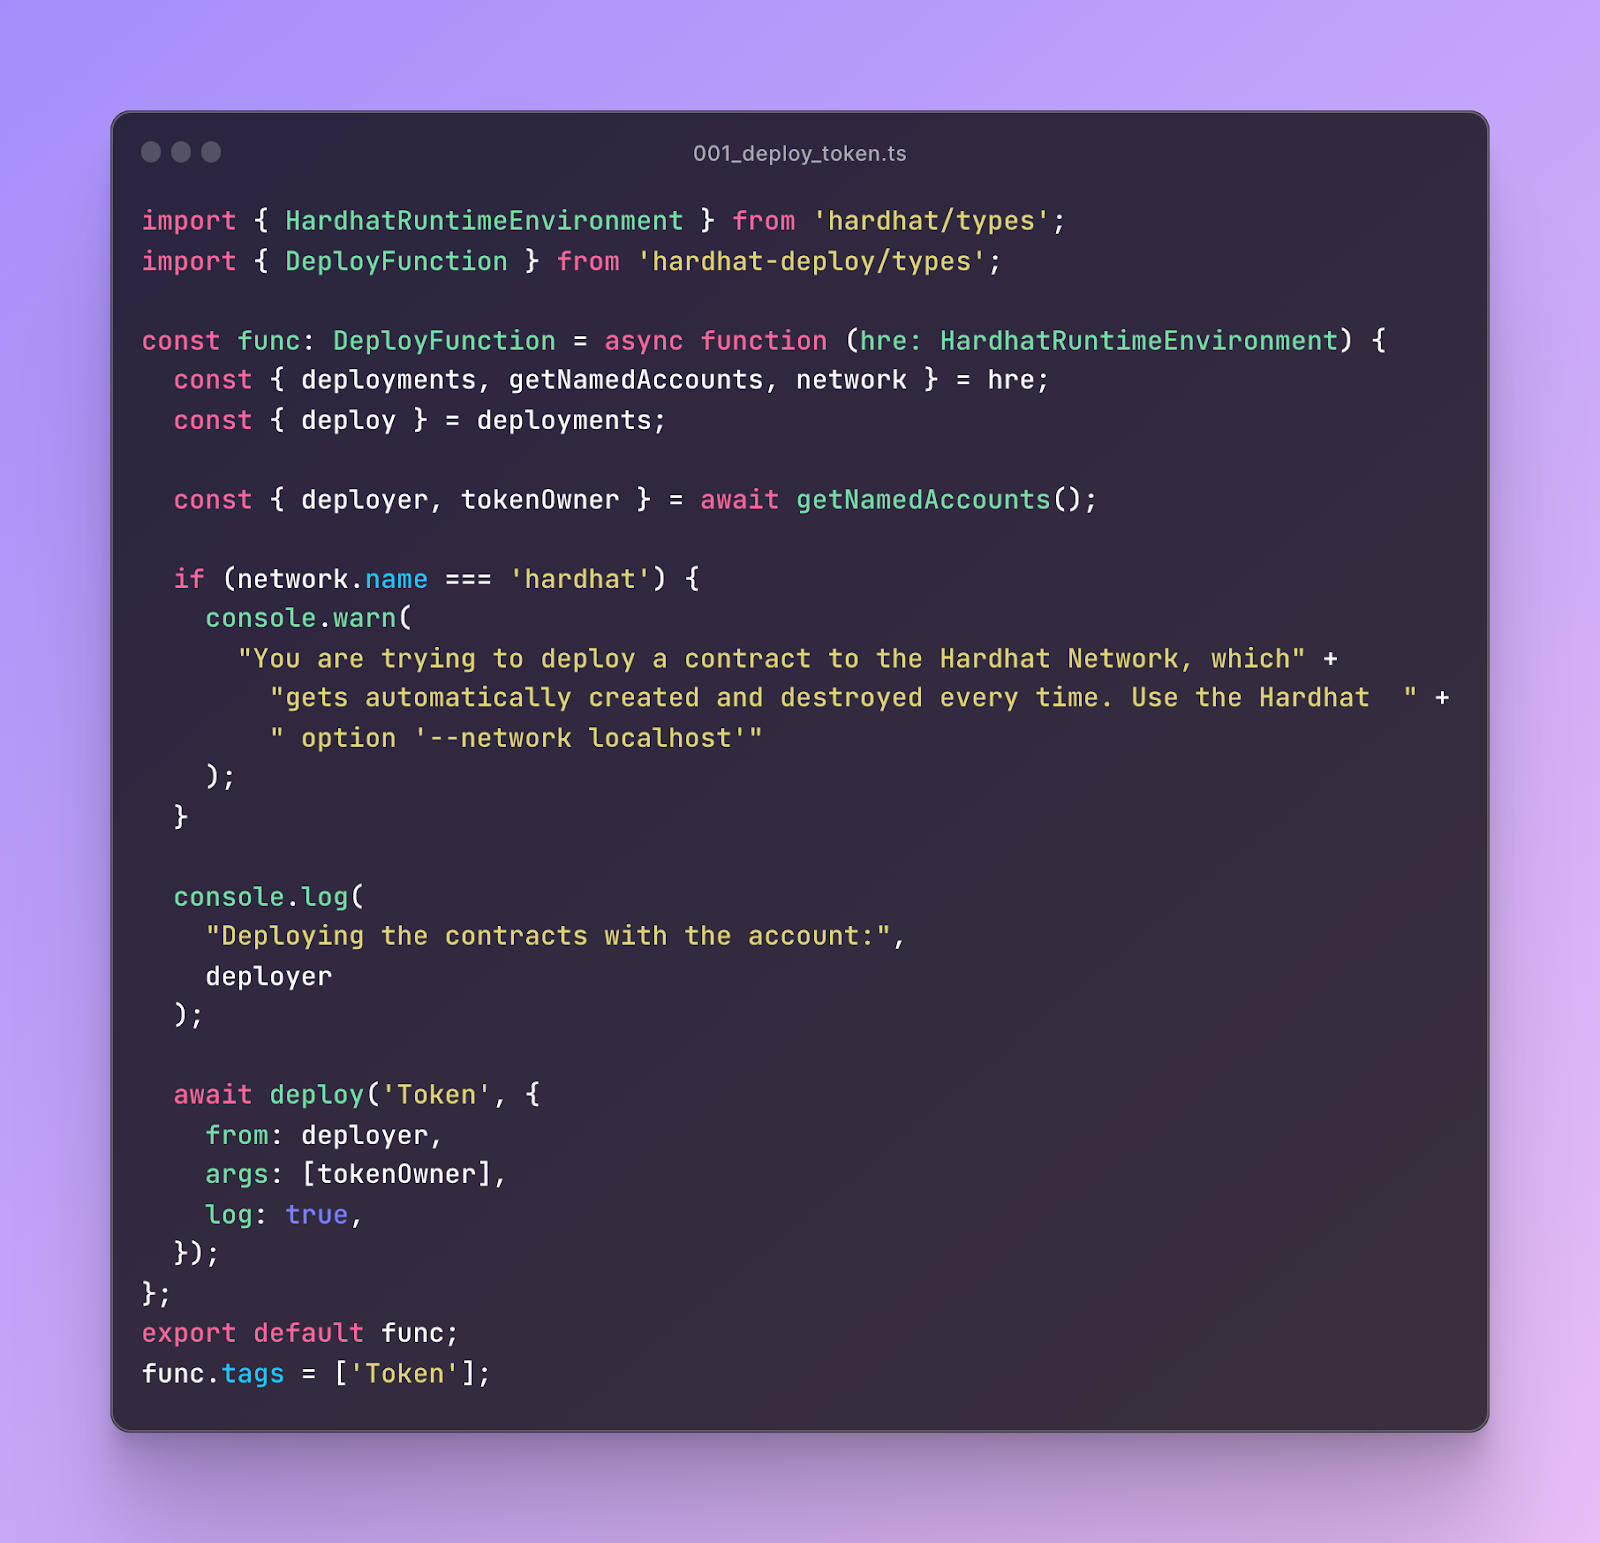
The deploy function receives as a parameter a HardhatRuntimeEnvironment, which comes in handy for accessing things like the network you’re deploying to, and the named accounts (specified on hardhat.config.ts). You can check hardhat’s documentation on the HardhatRuntimeEnvironment here.
In the tasks folder, you can create tasks that will be run by hardhat. You can check tasks/faucet.ts which is a simple task that transfers 1 ETH & 100 Tokens to an ethereum address. You might create a task to reset the state of a development environment, or to interact with your contracts, or to package your project.
You’ll also need to add the task to the hardhat.config.ts like this:
import faucet from "./tasks/faucet";

task("faucet", "Add funds to selected address")
	.addPositionalParam("receiver", "The Address that will receive them")
    .setAction(async (args, { ethers }) => {
    	const receiver = String(args.receiver)
        await faucet(receiver, ethers);
	}];
You can now run the faucet task on localhost by running the following command:
pnpm hardhat faucet <your-address> --network localhostNow let’s move on to the Frontend located inside the frontend folder. As explained in the previous section, it uses NextJs as the framework of choice. You can check Nextjs documentation for further details.
Inside pages/_app.tsx you can check the configuration for wagmi and RainbowKit. You should also check the Dapp component, located inside the components folder. This component contains the default business logic to implement a simple transfer. You can use it as a reference for understanding how the useSendTransaction and usePrepareSendTransaction wagmi hooks work, making it super easy to interact with your contracts. You can check wagmi’s documentation here.
For handling the wallet connection, I added RainbowKit’s ConnectButton component inside the NavBar.tsx file
And that’s it! By following these steps, you should understand the boilerplate’s architecture and which files can be modified to start developing your new project.
Moving Into Production
Once you have developed your decentralized application locally, the next step is to deploy it to a test network for further testing and finally to the Ethereum mainnet.
In this case, we will use the Goerli test network as an example. To get started, create an account with Alchemy and follow their instructions for generating an API key.
Once you have your API key, add it to your hardhat.config.ts file like this:
const { ALCHEMY_API_KEY, PRIVATE_KEY } = process.env;

const config: HardhatUserConfig = {
  solidity: "0.8.4",
  defaultNetwork: "hardhat",
  namedAccounts: {
	 ...
  },
  networks: {
    hardhat: {},
    goerli: {
      url: `https://eth-goerli.alchemyapi.io/v2/${ALCHEMY_API_KEY}`,
      accounts: [PRIVATE_KEY as string],
    },
  },
 ...
};
Notice that we have added a new network configuration for Goerli that points to Alchemy’s endpoint for that network. We also need to add our Alchemy API key as an environment variable directly in the .env file or as a command-line argument.
Next, we can deploy our contract to the Goerli network by running the following command:
pnpm hardhat deploy --network goerliDeploying the Frontend to Fleek
Now to deploy the Frontend, we’ll use Fleek CLI, which allows us to deploy to IPFS from the CLI. If you haven’t used Fleek CLI before, read the CLI section of our docs.
You’ll need to install the CLI as a global package by running the following command:
npm install -g @fleekxyz/cliThen, let’s move into the frontend project cd frontend and create a new Project:
fleek projects createAnd create a new site
fleek sites initWhen you start the process, you will be prompted to create a new site or use an existing one.
 > fleek sites init

 WARN! Fleek CLI is in beta phase, use it under your own responsibility

? Choose one of the existing sites or create a new one. ›

❯ Create a new site
Let’s start by creating a new one and inputting a name for the site.
✔ Choose one of the existing sites or create a new one. › Create a new site
✔ Type name of you new site. … fleek-demo-dapp
Now that we have named our site, we’ll need to specify the output directory., Since we’re using NextJs, the output directory should be out:
✔ Choose one of the existing sites or create a new one. › Create a new site
✔ Type name of you new site. … fleek-demo-docs
✔ Specify the dist directory from where the site will be uploaded from > out
For the last step, choose to add a build command, which will be pnpm run build
That’s it! Your site is set up. You will see a file named `fleek.json` has been created in your directory, which holds the configuration to deploy the site.
You can now deploy your site to IPFS by running fleek sites deploy:
 > fleek sites deploy
 WARN! Fleek CLI is in beta phase, use it under your own responsibility

> Success! Deployed! IPFS CID: QmQ88SAK9shZ7NUFTPJDcS9zuMmU7tDPbC9e9j5264Yfj4
If you are interested in other features like continuous integration, you can check this guide on deploying to fleek using GitHub Actions here.
Done! With this boilerplate, you can develop a dApp fully and deploy its frontend onto IPFS, all from a single unified repository. We’ll continue to iterate through this boilerplate to add options in the future, so feel free to hop into our Discord for requests or open an issue/PR on the repo itself!
This boilerplate is next.js based, but there are many amazing alternatives in other frameworks - such as Alchemy University’s Create Web3 App in React.
For more resources visit our LinkTree.