Get your Jekyll blog sailing on the Web3 waters! In this short tutorial, we will learn how to create a Jekyll blog and deploy it on Fleek so it can be shared through IPFS.
Generating a Jekyll Blog
Before anything, you will need to have Jekyll installed. Follow the instructions corresponding to your operating system here.
Once installed, we need to generate a blog, so run the command below.
jekyll new my blogThis will create a blog called my blog.
Updating the Jekyll blog is very easy. In the root directory of the newly created blog, you will find a file named _config.yml.
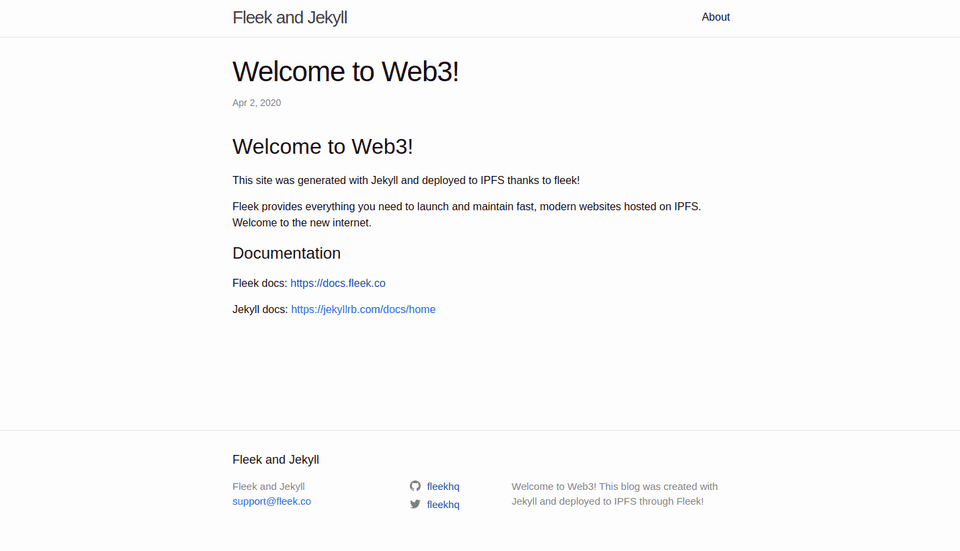
This file will allow you to modify configurations that will be used when generating the blog. In my case, I’ve changed the title and description.
# Welcome to Jekyll!
#
# This config file is meant for settings that affect your whole blog, values
# which you are expected to set up once and rarely edit after that. If you find
# yourself editing this file very often, consider using Jekyll's data files
# feature for the data you need to update frequently.
#
# For technical reasons, this file is *NOT* reloaded automatically when you use
# 'bundle exec jekyll serve'. If you change this file, please restart the server process.
#
# If you need help with YAML syntax, here are some quick references for you:
# https://learn-the-web.algonquindesign.ca/topics/markdown-yaml-cheat-sheet/#yaml
# https://learnxinyminutes.com/docs/yaml/
#
# Site settings
# These are used to personalize your new site. If you look in the HTML files,
# you will see them accessed via {{ site.title }}, {{ site.email }}, and so on.
# You can create any custom variable you would like, and they will be accessible
# in the templates via {{ site.myvariable }}.

title: Fleek and Jekyll
email: support@fleek.co
description: >- # this means to ignore newlines until "baseurl:"
  Welcome to Web3! This blog was created with Jekyll and deployed to IPFS through Fleek!
baseurl: "" # the subpath of your site, e.g. /blog
url: "" # the base hostname & protocol for your site, e.g. http://example.com
twitter_username: fleekhq
github_username:  fleekhq

# Build settings
theme: minima
plugins:
  - jekyll-feed

# Exclude from processing.
# The following items will not be processed, by default.
# Any item listed under the `exclude:` key here will be automatically added to
# the internal "default list".
#
# Excluded items can be processed by explicitly listing the directories or
# their entries' file path in the `include:` list.
#
# exclude:
#   - .sass-cache/
#   - .jekyll-cache/
#   - gemfiles/
#   - Gemfile
#   - Gemfile.lock
#   - node_modules/
#   - vendor/bundle/
#   - vendor/cache/
#   - vendor/gems/
#   - vendor/ruby/
In the _config.yml file, you may have noticed a line with theme: minima. That is because we are using the default theme. For this tutorial, we will keep the default so we can focus on deploying the site, but you can go here to learn more!
Finally, what is a blog without an awesome blog post? Go to the _posts folder which is the root directory. There you will find a sample blog post. You can make a copy of this file to use as a reference for creating new posts. Essentially, all future new posts will be in the _posts folder and named in the format yyyy-mm-dd-title.md just like the reference post file.
If you open the blog post file, you will notice that it is written in markdown. Click here to learn more about markdown. Markdown will make it very straightforward for you to write your content.
Here’s my sample blog post:
---
layout: post
title:  "Welcome to Web3!"
date:   2020-04-02 15:44:16 -0400
categories: fleek jekyll web3
---

## Welcome to Web3!

This site was generated with Jekyll and deployed to IPFS thanks to fleek!

Fleek provides everything you need to launch and maintain fast, modern websites hosted on IPFS. Welcome to the new internet.

# Documentation

Fleek docs:  <https://docs.fleek.co>

Jekyll docs: <https://jekyllrb.com/docs/home>
Once you are ready, you can see your blog in action by running the site in your local machine.
bundle exec jekyll serveGo to http://localhost:4000 and see the result.
Awesome! Now we are ready to deploy to IPFS!!
Deploying to IPFS through Fleek
The first step is to push the Jekyll project to Github. That will allow Fleek to get access to our project for the deployment.
In our case, I’ve pushed my project to this repo: https://github.com/SamueleA/fleek-jekyll-blog
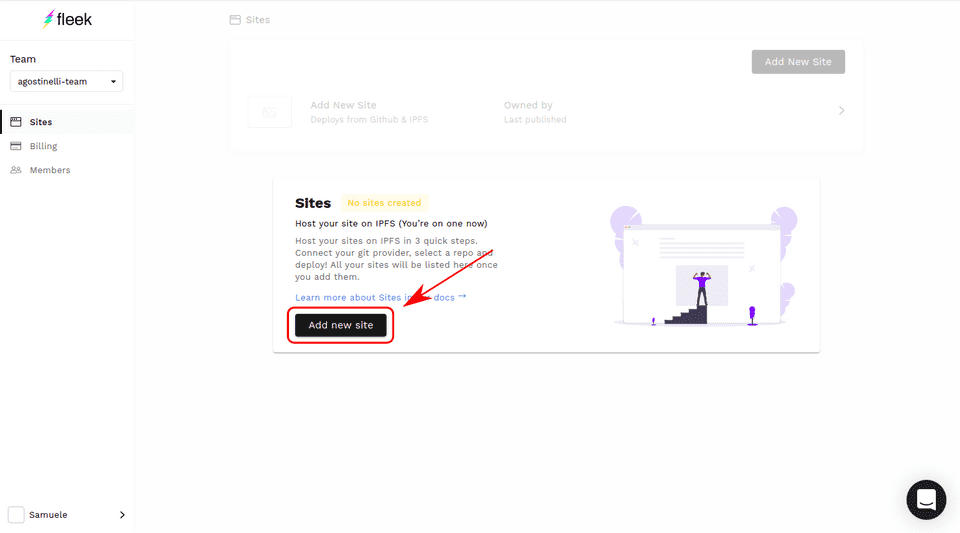
Now, we must log to fleek and create a new site.
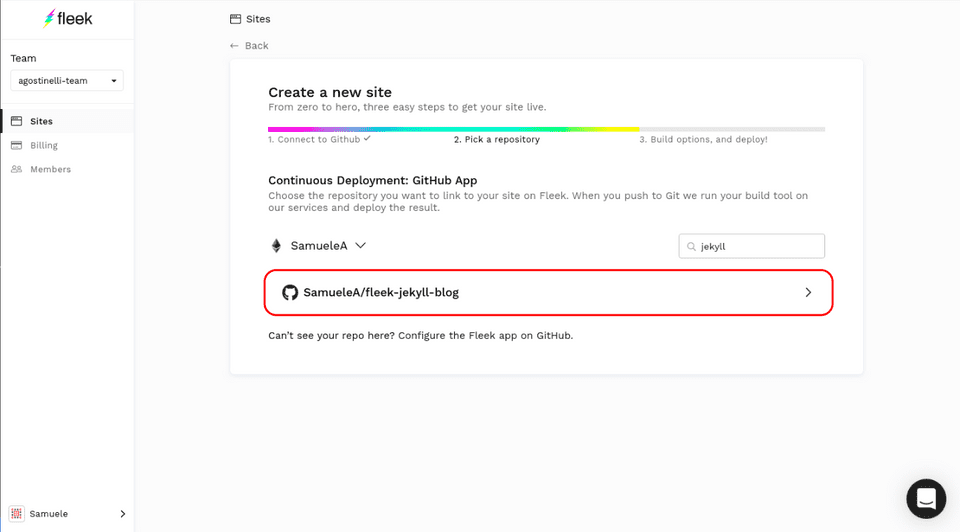
Pick the repo containing your Jekyll project.
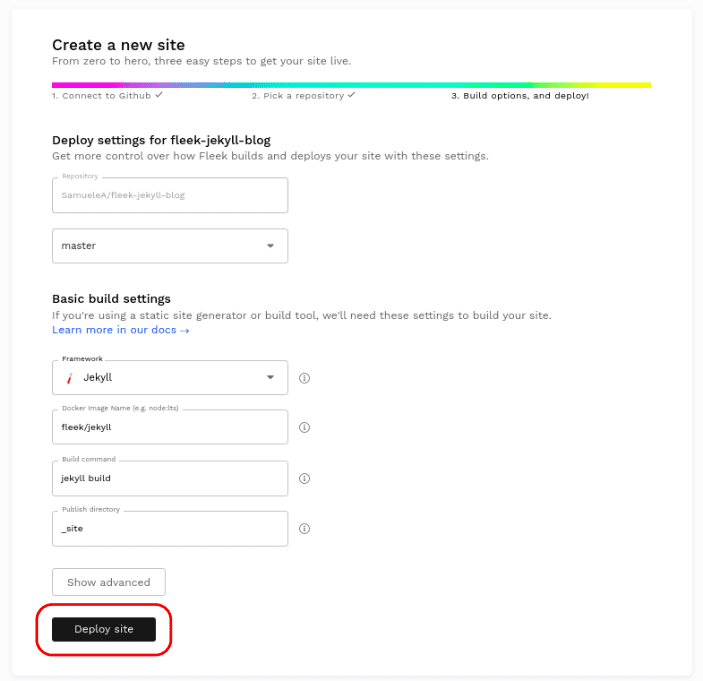
Luckily for us, Fleek has automatically detected our Jekyll project and filled the build settings with the right information. All we have to do is click on Deploy Site.
Let’s wait a bit for the site to deploy. This should take no longer than a few minutes.
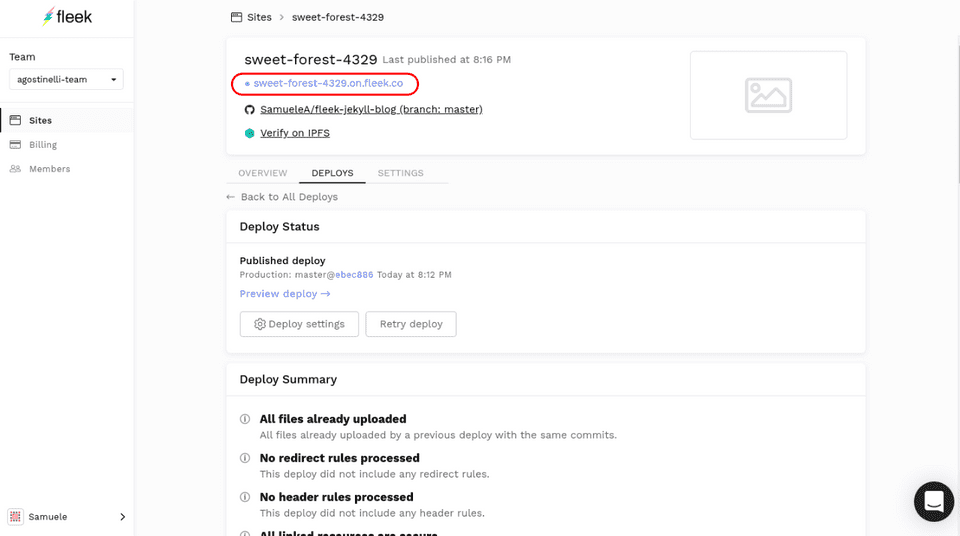
Upon deployment, Fleek will automatically assign a default URL to the site. Here is mine: https://sweet-forest-4329.on.fleek.co/
Congratulations!
Congrats! You’ve just joined the Web3 family by deploying a Jekyll blog to IPFS with Fleek.
We love to see what our users come up with. Do not hesitate to share your work with us by tweeting your deployed site!
